***Note: Some work must be done the day before***
This devotional is really two in one. The first stage is putting together the paper mache Calvary and grave. After a day of drying, the scene will be ready for painting and decorating. While this decorating is taking place the salvation story can be told. Once the decoration is completed, it is the children’s turn to tell the special story to you. It is a story that can change their lives!
Note: This is a devotional for older children. If you feel your children are still too young to benefit from this format, take the time to tell the Easter story as found in Part III of this devotional. This may happen at the dinner table while you are enjoying your Easter dinner.
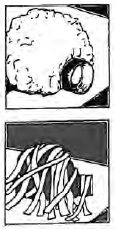
Mount Calvary and the Grave: Rip two sheets of newspaper into 2” x 8” strips. Mix together the flour and water. Lay the piece of cardboard in front of you; take half a sheet of newspaper and wad it up into a ball. Set the ball in the center of the cardboard. This is to be Mount Calvary. Next, you need to cut the top three-fourths off of the juice can leaving only the bottom and one inch of the sides. Lay the juice can on its side, resting on the cardboard. Tape the juice can to the edge of the paper ball so the mouth of the can opens to the front of your display. This is the grave.
Run the strips through the flour and water mixture making sure they are completely wet. Then run the strip through your fingers removing the excess mixture. Lay the strips over the ball and tin and onto the cardboard forming the gentle slope of a hill. Overlap the strips at different angles and in a nonuniform design until the ball and tin are effectively covered. The end result should look like a cave that has been cut out of a rock. Paper mache the lid on all sides. This is the stone for the tomb.
Allow these to dry for about 24 hours so they are easily painted. A blow dryer can help rush this process if needed.
a. Painting: The cardboard and hill are painted green. The fastest and easiest way is to dip the sponge into the green paint and let the children dab it all over the appropriate area. The tomb and stone are painted brown with a brush.
b. The Garden: The tomb Jesus was buried in was in a garden so we need to add a few trees and some flowers. The trees are made out of one popsicle stick broken in half and green construction paper for the leaves. The flowers are made from the colored construction paper to create a beautiful garden. Poke small holes into the cardboard where the trees are to stand (on either side of the tomb). Put glue around the base of the popsicle sticks. The trees will need to be held in place until the glue dries. The flowers are glued onto the cardboard.
c. The Cross: The second popsicle stick needs to be broken at the one-third/two-thirds mark. This will enable the two-thirds part to be the vertical long piece and the one-third part to be the horizontal cross piece. Glue these two pieces together to form a cross and hold in place until the glue is dry. Poke a hole in the top of your paper mache hill and stick the base of the cross into the hole. Put a little glue around the base to help hold it in place.
d. Jesus: A small paper doll figure of a man needs to be cut from the sheet of paper. Dark hair, a face with a beard and clothes need to be drawn on our Jesus. Although we do not really know what he looked like, we can try to imagine.
You need to tell the details of Jesus’ crucifixion and resurrection to your children while you are doing the decorating. This can be done by reading the story from a children’s Bible or you can tell the story in your own words. The story is found in Luke 22-24.
Make sure the details below are included in the telling of this special story.
Now it is the children’s turn to tell the story using the paper doll figure. Help them to incorporate into their story as many details as possible from what you told them earlier. During the Easter holiday let your children tell the story over and over. It would even be good to use your Calvary and Garden Tomb display as a centerpiece for the Easter dinner so the story can again be shared with those around the table.
Not only do you want your children to understand the details of the story, but also the fact that Jesus suffered and died for us. As you study Jesus in the Getting to Know Jesus section, the whole plan of salvation will be understood better by your children, but right now you want them to take time to say thank you to Jesus for going through all of this for us, because it is through Jesus’ death that we have eternal life.